Riding crop is not just a piece of equipment it’s a communication tool between rider and horse. When used correctly, it refines cues, improves responsiveness, and helps maintain rhythm without causing discomfort. However, improper grip or poor hand position can confuse your horse, affect balance, and even create safety risks.
In this complete guide, you’ll learn proper riding crop holds, safe grip techniques, correct hand positions, common mistakes, discipline-specific styles, and expert training tips. Whether you’re a beginner or an experienced rider, mastering these techniques will improve control, comfort, and confidence in the saddle.
Why Riding Crop Grip Technique Matters
Before learning how to hold a riding crop, it’s important to understand why grip technique matters so much.
A correct hold helps you:
- Maintain steady rein contact
- Keep balanced posture
- Give precise cues
- Avoid accidental hits
- Improve horse responsiveness
- Ride safely and ethically
A poor grip can:
- Distract your horse
- Cause uneven signals
- Affect steering
- Create tension in your hands
- Reduce riding performance
Think of the crop as an extension of your arm, not a tool for force.
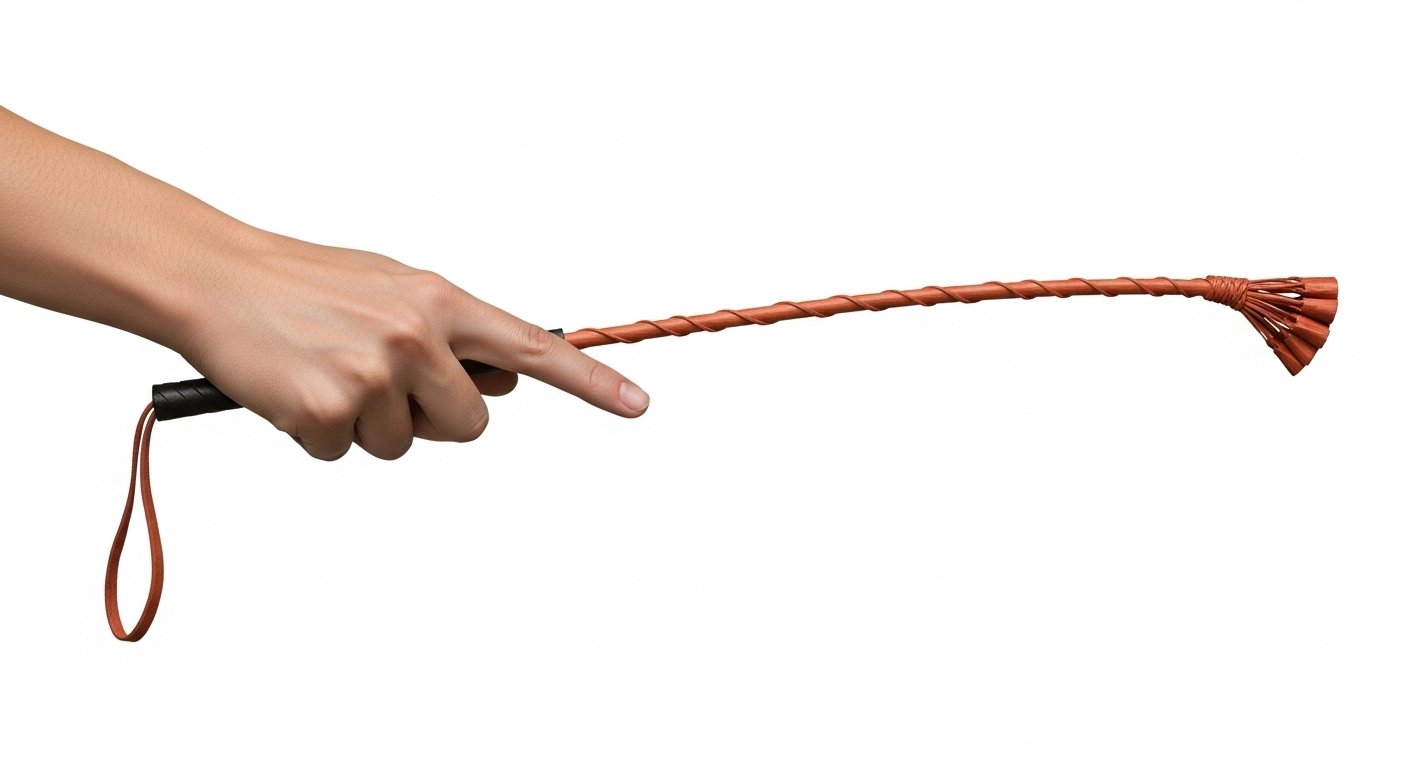
Understanding the Riding Crop Structure
Knowing the parts helps you hold it correctly:
- Handle/Grip – where your hand rests
- Shaft – flexible body
- Popper/Flap – soft striking end
- Wrist Loop – prevents dropping
Each part affects how you position your hand and use pressure.
Correct Ways to Hold a Riding Crop
Let’s break down the most effective and widely used grip styles.
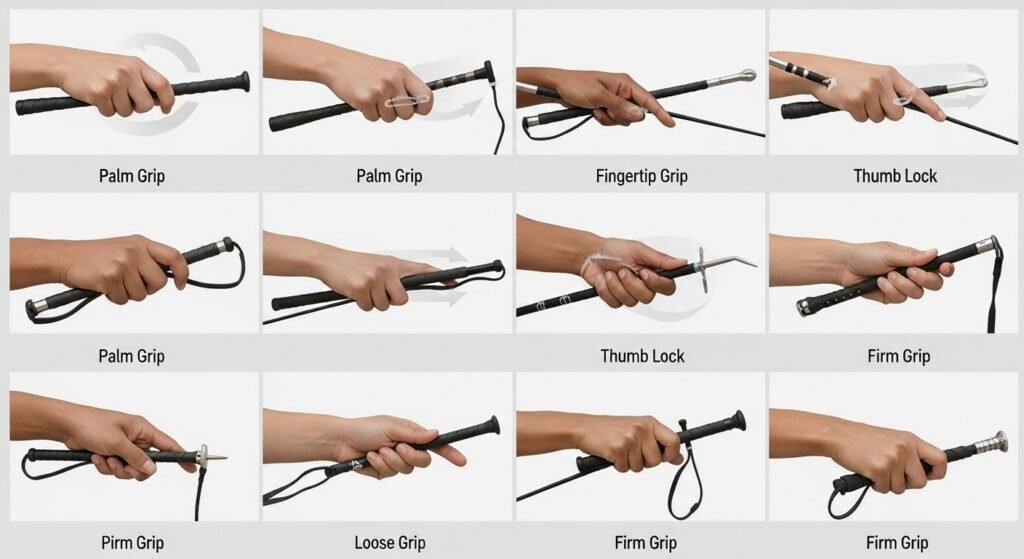
1. Classic Rein-and-Crop Hold (Beginner Friendly)
This is the most common and safest hold, especially for English riding.
How to do it:
- Hold your reins normally
- Place the crop handle across your palm
- Rest it under your thumb
- Keep the shaft pointing backward
Benefits:
Secure grip
Quick access
Maintains rein control
Ideal for beginners
Best for:
- Flatwork
- Schooling
- Casual riding
- Beginner lessons
This hold allows you to tap gently without changing your hand position.
Two-Finger Support Grip
Used by many intermediate and advanced riders for better finesse.
How to do it:
- Slide the crop between your middle and ring finger
- Keep thumb controlling rein contact
- Let the crop float lightly
Benefits:
Greater sensitivity
Less hand tension
Faster cue delivery
More precise aids
Best for:
- Dressage
- Light schooling
- Precision riding
This method offers subtle communication rather than force.
Wrist Loop Secure Hold
Perfect for riders worried about dropping the crop.
How to do it:
- Slide wrist through the loop
- Hold handle normally
- Keep strap loose, not tight
Benefits:
Prevents dropping
Safer for beginners
Useful during jumping or trail rides
Warning:
Do NOT tighten the strap too much it must release easily in emergencies.
Proper Riding Crop Position While Riding
Grip alone isn’t enough. Position matters too.
Correct positioning rules:
- Crop should point backward
- Keep wrist straight
- Hands level and steady
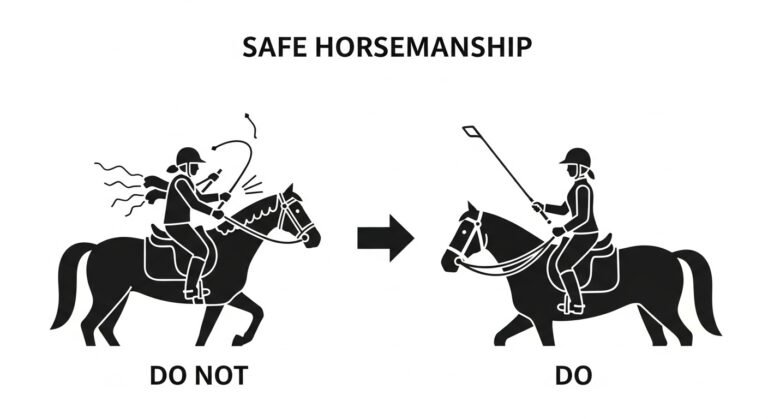
- Avoid waving the crop
- Keep it quiet unless needed
Your crop should be invisible most of the time and only used as reinforcement.
Discipline-Based Grip Techniques
Different riding styles use crops differently.
Dressage
- Long whip
- Held lightly
- Used for subtle leg reinforcement
- Never lifted high
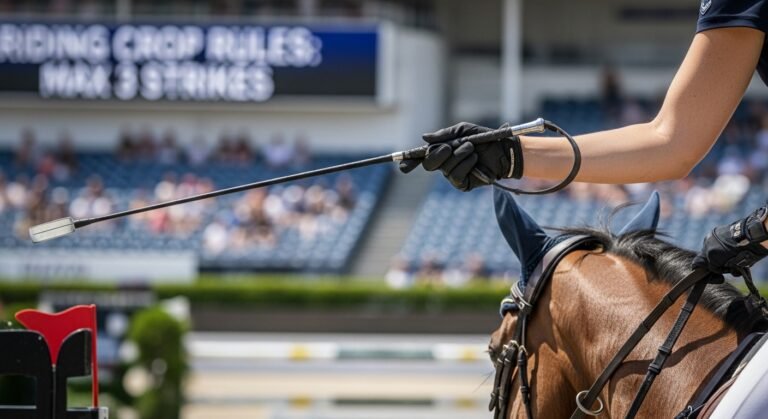
Show Jumping
- Short bat
- Quick taps
- Secure grip
- Wrist loop recommended
Trail Riding
- Optional
- Used gently
- Secure hold to avoid dropping
Racing
- Specialized grip
- Lightweight crops
- Controlled, minimal use
Match your grip style to your discipline.
Step-by-Step Beginner Guide
If you’re new, follow this:
Step 1
Start with classic hold
Step 2
Practice holding reins + crop while walking
Step 3
Keep wrist relaxed
Step 4
Tap lightly behind leg only when needed
Step 5
Never use excessive force
Consistency builds confidence for both rider and horse.
Common Riding Crop Grip Mistakes
Avoid these frequent errors:
Holding too tight
Pointing crop upward
Swinging randomly
Using force instead of timing
Changing rein length to use crop
Letting crop distract horse
A crop should assist, not dominate.
Safety Tips Every Rider Should Follow
Safety must always come first.
- Use soft poppers only
- Never strike the horse’s face or neck
- Avoid repeated hits
- Stay calm
- Check equipment regularly
- Replace damaged crops
Ethical riding builds trust.
Advanced Tips for Better Control
Once comfortable, try:
Soft Wrist Control
Small wrist movement = better precision
Quiet Hands
Less movement keeps horse relaxed
Timing Over Strength
Correct timing works better than force
Leg First, Crop Second
Crop reinforces it never replaces leg aids
Riding Crop Training Drills
Drill 1: Silent Hands
Ride 5 minutes without moving crop
Drill 2: Tap Timing
Tap only when leg cue is ignored
Drill 3: Grip Relaxation
Loosen fingers while maintaining control
Drill 4: One-Hand Balance
Practice holding crop steadily while steering
These drills build confidence and coordination.
How to Choose the Right Crop for Better Grip
Look for:
- Non-slip rubber handle
- Lightweight shaft
- Comfortable thickness
- Soft wrist strap
- Correct length for discipline
A good handle improves grip naturally.
Benefits of Mastering Riding Crop Holds
When you learn proper technique:
Better communication
Improved horse response
Cleaner riding posture
Increased safety
More professional appearance
Reduced hand fatigue
Small improvements make a big difference.
Expert Riding Crop Etiquette
Professional riders follow unwritten rules:
- Use only when necessary
- Keep movements subtle
- Never show anger
- Respect horse welfare
- Stay calm
The crop is a tool for guidance, not punishment.
FAQs Riding Crop Holds
Q1: How tight should I hold a riding crop?
Ans: Firm enough to control, loose enough to stay relaxed.
Q2: Which hand should hold the crop?
Ans: Usually the dominant hand, but depends on discipline.
Q3: Can beginners use a riding crop?
Ans: Yes, but under instruction and with gentle technique.
Q4: Is a wrist strap necessary?
Ans: Helpful for beginners but not mandatory.
Q5: Can I switch hands?
Ans: Yes, but maintain rein control.
Q6: How often should I use the crop?
Ans: Only when reinforcement is needed not constantly.
Final Thoughts
Learning proper riding crop holds and grip techniques transforms your riding from average to refined. The right grip gives you control, safety, and precision while keeping your horse comfortable and responsive.